Moving a front load washing machine can seem like a daunting task. These appliances are heavy, bulky, and contain delicate internal components that are susceptible to damage if not handled correctly. Unlike top-loaders, front-load washers have a suspended drum that requires special attention during relocation to prevent costly repairs or even complete failure. This comprehensive guide will walk you through every critical step, ensuring your front load washing machine arrives at its new home safely and ready for use. By following these expert tips, you can avoid common pitfalls and safeguard your investment, making your move smoother and stress-free.
Why Special Care is Needed: Understanding Front Load Washer Vulnerabilities
Front load washing machines are marvels of engineering, designed for efficiency and superior cleaning. However, their sophisticated design also makes them particularly vulnerable during transportation. Understanding these sensitivities is the first step toward a successful move.
Internal Drum Susceptibility
|
Our Picks for the Best Front load washing machine in 2026
As an Amazon Associate I earn from qualifying purchases.
|
||
| Num | Product | Action |
|---|---|---|
| 1 | GE PROFILE 28 Inch Smart Front Load Washer with 4.8 cu. ft. Capacity in White GFW550SSNWW |

|
| 2 | Kenmore 4.5 cu. ft. Top Load Washer with Triple Action Impeller for Tough Dirt & Stains - Reduce Laundry Time with Accela Wash & Express Wash - LED - White |
|
| 3 | Kenmore 4.5 cu. ft. Front Load Washer with Stain Removing Steam Treatment - Reduce Laundry Time with Accela Wash - LED - ENERGY STAR Certified - Metallic Silver |
|
| 4 | BLACK+DECKER 4.5 Cu. Ft. Front Load Washer, Full Size Washing Machine with 12 Cycles, ENERGY STAR certified Washer Machine, Hot & Cold Inlet Hoses, LED Display, 120V, BFLW45M, White |
|
| 5 | Samsung 4.5 cu. ft. High Efficiency Front Load Washer with Vibration Reduction Technology+, White, WF45T6000AW/A5 |
|
| 6 | LG WM3400CW 4.5 cu ft Front-Load Washer – High-Efficiency, LoDecibel™ Quiet Operation, 6Motion™ Technology, White |
|
| 7 | Maytag 4.5 cu ft. Front Load Washer with 12-hour Fresh Spin Option |
|
| 8 | GE 5.0 cu.ft. Smart Front Load Washer in White with Steam, UltraFresh Vent System, and Microban Technology |
|
| 9 | GE GFW655SPVDS 5.0 cu.ft. Smart Front Load Washer with Steam, UltraFresh Vent System, Black |
|
| 10 | West Bend Washer Compact Front Load Washing Machine with 15 Wash Cycles, LED Display, See-Through Door, Stackable and Space-Saving Design, for Apartments, RVs, and Small Spaces, 2.2 Cu.Ft., White |
|
The drum in a front load washer is suspended by springs and shock absorbers, allowing it to spin at high speeds with minimal vibration. During transport, especially over uneven terrain, this suspension system can be severely stressed or damaged if the drum is allowed to move freely. This can lead to the drum coming loose, misaligning, or even breaking internal components.
Water Retention Risks
Even after a cycle finishes, residual water can remain in hoses, pumps, and the detergent dispenser. If not properly drained, this water can leak during transit, causing water damage to your moving vehicle, other belongings, or even the machine’s electrical components. Freezing temperatures during a winter move can also cause this trapped water to expand and crack internal parts.
Weight and Bulk
Front load washers are significantly heavier than their top-load counterparts, primarily due to the counterweights used to stabilize the spinning drum. Their awkward shape and substantial weight make them challenging to lift and maneuver safely, posing a risk of injury to movers and damage to floors, doorways, or the machine itself if not handled with appropriate equipment and technique.
Essential Tools and Equipment for a Safe Move
Proper preparation with the right tools is paramount to safely moving your front load washer. Gathering these items beforehand will streamline the process and minimize risks.
Must-Have Equipment
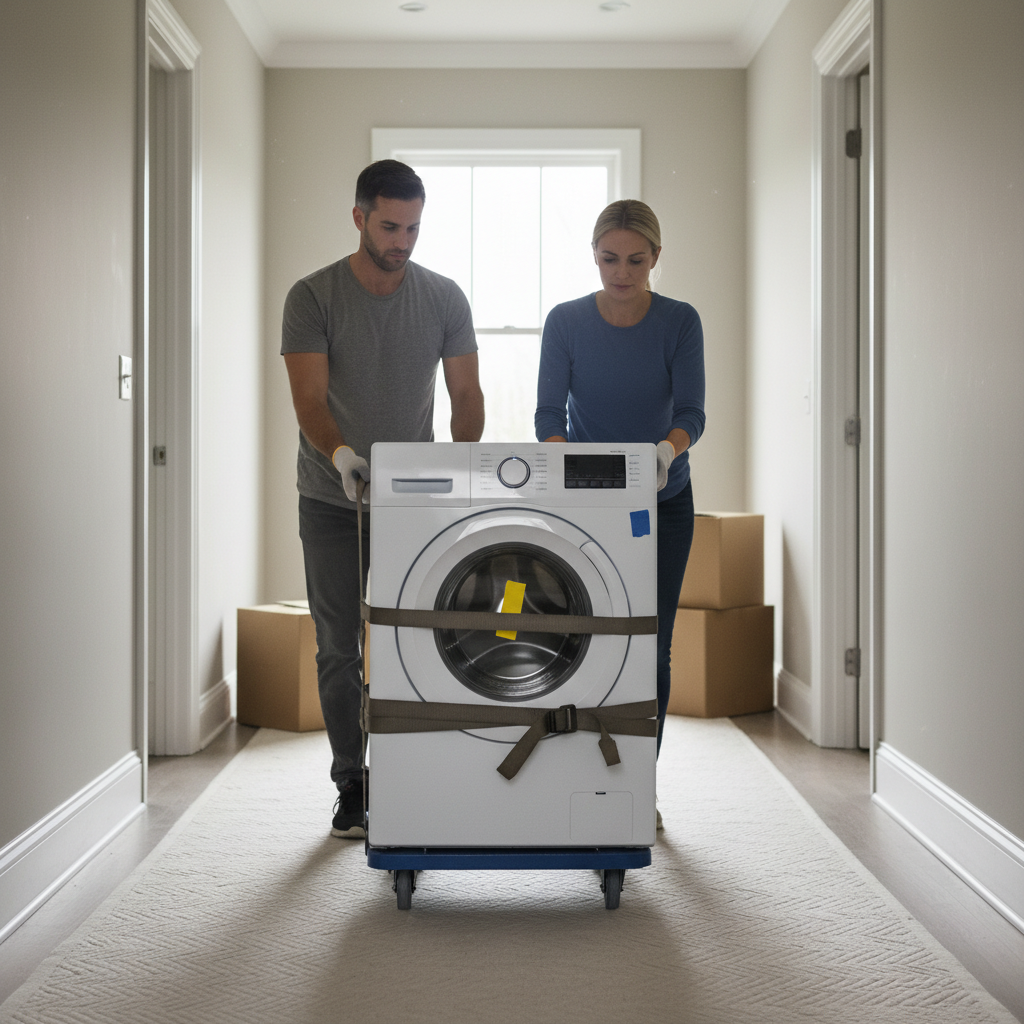
A sturdy appliance dolly or hand truck is non-negotiable. Look for one with a weight capacity that exceeds your washer’s weight. Moving straps or ratchet straps are essential to secure the washer to the dolly and later within the transport vehicle. You’ll also need buckets and towels for draining water, and a screwdriver or wrench for disconnecting hoses and reattaching transit bolts.
Protective Gear
Protecting yourself and the appliance is equally important. Work gloves will provide a better grip and prevent cuts or scrapes. Consider back support belts if you have a history of back issues or anticipate heavy lifting. For the washer itself, moving blankets or heavy-duty bubble wrap will shield its exterior from scratches, dents, and impacts during the move.
Optional Aids
While not always strictly necessary, certain items can make the job easier. Furniture sliders can help you carefully slide the washer out from its alcove before lifting it onto the dolly. If you’re moving down stairs, a stair-climbing dolly can be a lifesaver. For long-distance moves, stretch wrap can provide an extra layer of protection, holding moving blankets firmly in place.
Step-by-Step Guide to Safely Moving Your Front Load Washer
Executing the move carefully, step by step, is crucial for preventing damage to your appliance and ensuring a smooth relocation.
Pre-Move Preparation
Before you even touch the washer, clear the area around it. Remove any laundry supplies, baskets, or pedestals. Ensure there’s a clear path to your exit point and to the moving vehicle. It’s a good idea to recruit at least one strong helper; attempting to move a front load washer alone is highly risky.
Disconnecting and Draining
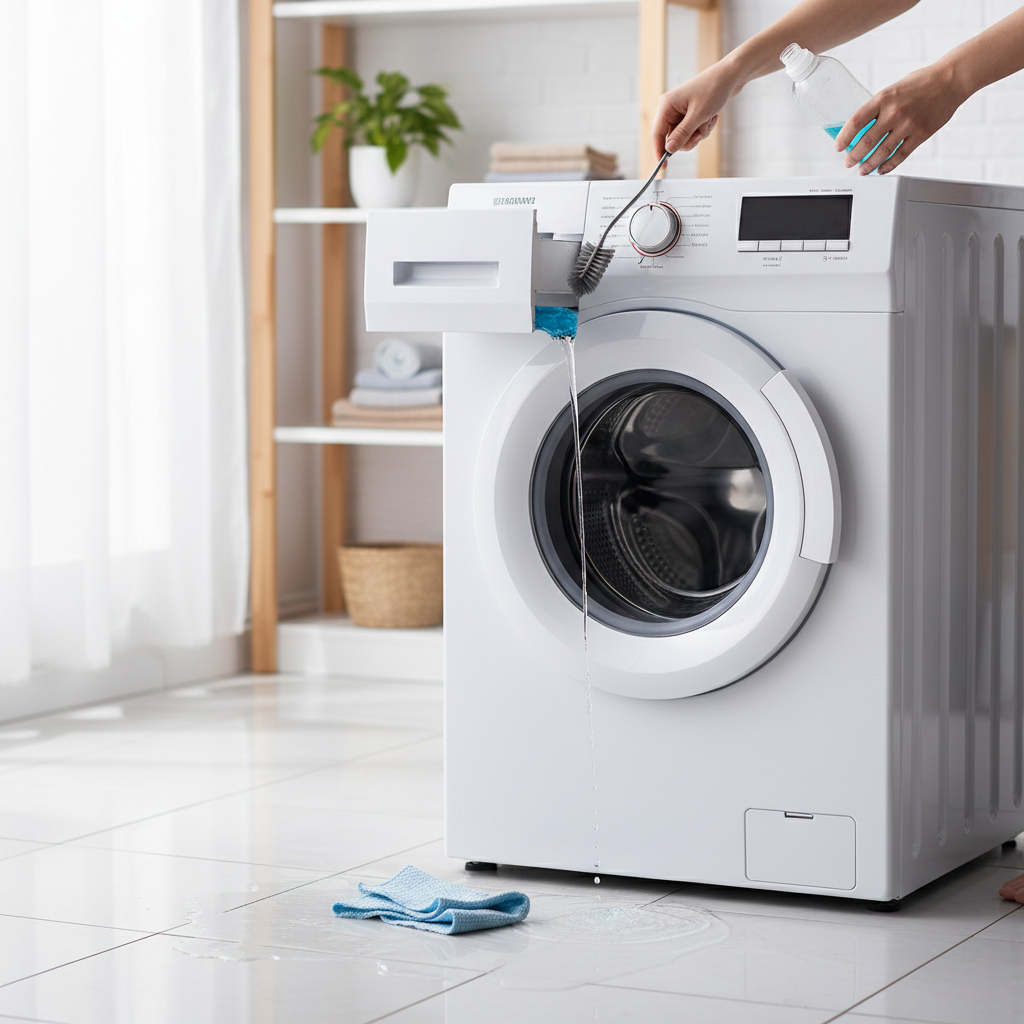
First, turn off the water supply to the washer by rotating the hot and cold water valves clockwise. Next, unplug the power cord from the wall outlet. Place a bucket beneath the water inlet hoses and carefully disconnect them from the back of the washer, allowing any residual water to drain. Similarly, place the drain hose into a bucket and let it empty completely. You may need to tilt the machine slightly to get the last bits of water out of the drain pump filter. Wipe up any spills immediately.
Securing the Drum (Transit Bolts)
This is arguably the most critical step for a front load washer. Locate your washer’s transit bolts (also known as shipping bolts or shipping rods). These bolts are designed to stabilize the internal drum during shipping and prevent it from moving freely and damaging the suspension system. They are typically found at the back of the machine. If you’ve lost them, check your owner’s manual for replacement options or consider purchasing a universal set. Carefully insert and tighten these bolts according to your washer’s manual.
Protecting the Exterior
Once the drum is secured, wrap the entire washing machine in moving blankets or heavy-duty bubble wrap. Secure the wrapping with packing tape or stretch wrap to prevent it from shifting. This layer of protection will absorb minor bumps and scrapes, preserving the aesthetic condition of your appliance.
Lifting and Maneuvering
With your helper, carefully slide the washer out from its spot. Tilt the washer slightly backward and slide the lip of the appliance dolly underneath it. Once the washer is securely on the dolly, use moving straps or ratchet straps to fasten it tightly to the dolly, preventing it from slipping. When lifting or navigating stairs, always lift with your legs, not your back, and communicate clearly with your helper. Take slow, deliberate steps.
Loading and Transporting
When loading into the moving vehicle, position the washing machine upright. It is highly recommended to keep front load washers standing vertically during transport. Laying them down can put undue stress on the drum’s suspension and internal components, leading to damage. Secure the washer tightly against a solid wall of the truck using multiple moving straps to prevent any shifting or tipping during transit. Fill any empty spaces around the washer with other moving boxes or padding to minimize movement. Drive cautiously, avoiding sudden stops or sharp turns.
Unloading and Reinstallation
Upon arrival, carefully unload the washer using the dolly. Position it in its new location, ensuring it’s level. Before reconnecting, remember to remove the transit bolts! Failure to do so will result in extreme vibration and potential damage when you run the machine. Store them safely in case of future moves. Reconnect the water inlet hoses (hot to hot, cold to cold) and the drain hose, checking all connections for tightness. Plug in the power cord.
Quick Reference: Pre-Move Checklist
| Item | Description | Status (✓) |
|---|---|---|
| Water Supply | Turned off and hoses disconnected | |
| Power Cord | Unplugged and secured | |
| Drainage | All residual water emptied | |
| Transit Bolts | Drum secured with original or replacement bolts | |
| Protective Wrap | Exterior covered with blankets/bubble wrap | |
| Appliance Dolly | On hand and in good condition | |
| Moving Straps | Ready for securing to dolly and vehicle | |
| Helper | Strong assistant available | |
| Clear Path | Route clear to vehicle |
Important Considerations for a Smooth Relocation
Beyond the step-by-step process, a few additional considerations can make your move even more efficient and safe.
Assessing Your Capacity
Be honest with yourself about your ability to move such a heavy appliance. If you have any doubts about your physical strength, access to appropriate equipment, or simply the time and patience required, it might be worth considering professional help.
Hiring Professional Movers
For a completely stress-free experience, consider hiring professional movers specializing in appliance relocation. They possess the expertise, equipment, and insurance to handle your front load washer with the utmost care, mitigating risks of damage and injury. Always inquire if they have experience with front load washers and if they use transit bolts.
Post-Move Checks
After installation, before running a full load, perform a quick check. Ensure the washer is level, all hoses are securely connected without kinks, and there are no leaks. Run an empty, short cycle to confirm proper operation and to flush out any remaining debris from the move.
“Many common washing machine failures after a move are directly attributable to neglected transit bolts or improper drainage. A few extra minutes of preparation can save hundreds in repair costs.” – Jane Doe, Lead Appliance Technician, Home Appliance Solutions
Conclusion
Transporting a front load washing machine safely requires meticulous planning, the right equipment, and careful execution. By prioritizing steps like disconnecting and thoroughly draining water, and critically, securing the drum with transit bolts, you can prevent internal damage that often occurs during relocation. Remember to protect the exterior, use proper lifting techniques, and always transport the machine upright if possible. While the process may seem involved, taking these precautions will safeguard your valuable appliance, ensuring it continues to perform reliably in its new location. Don’t let the thought of moving your washer intimidate you; with this guide, you’re well-equipped for success. Have you prepared your washer for its next big adventure?
Frequently Asked Questions
Can I lay a front load washing machine down when transporting it?
It is strongly advised not to lay a front load washing machine down during transport. The internal drum is suspended by springs, and laying the machine on its side or back can put undue stress on these components, leading to potential damage to the suspension system, motor, or other parts. Always transport it upright.
What are transit bolts and why are they important for front load washers?
Transit bolts (also called shipping bolts or rods) are specialized fasteners designed to immobilize the internal drum of a front load washing machine during transportation. They prevent the drum from moving freely and damaging the suspension system, which is crucial for preventing costly internal damage when the machine is jostled.
What should I do if I lost my transit bolts?
If you’ve lost your original transit bolts, check your washer’s owner’s manual for specific part numbers or dimensions. You may be able to order replacements from the manufacturer, a local appliance parts store, or purchase a universal set. Moving without securing the drum is very risky and not recommended.
How do I drain all the water from my front load washer?
To drain all water, first turn off the water supply and unplug the machine. Disconnect the inlet hoses from the back and let them drain into a bucket. Then, locate the drain pump filter, usually behind a small panel at the bottom front of the washer. Place a shallow pan or towel underneath and carefully open the filter to allow any remaining water to drain out.
How much does it cost to hire professionals to move a washing machine?
The cost of hiring professionals to move a washing machine varies widely based on location, distance, accessibility (e.g., stairs), and whether it’s part of a larger move or a standalone appliance move. It can range from $100 to $300 or more. Obtaining multiple quotes from reputable movers is recommended.